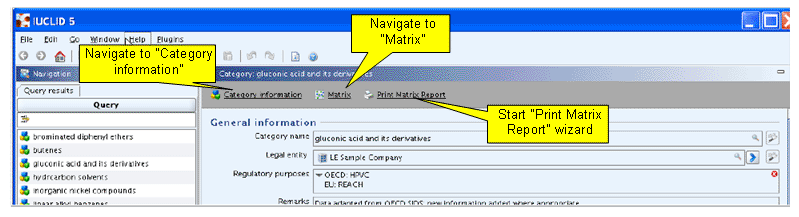
IUCLID provides a matrix of data availability, which is designed to give a rapid and easy overview of all relevant endpoints for all members of a selected Category. This feature is accessible by clicking the link "Matrix" on the navigation bar below the titlebar. Clicking the link "Print Matrix Report" starts a wizard which guides you through the print settings. Both features are described in detail in the following subchapters.
The matrix of data availability provided with this feature is intended to give a rapid and easy overview of all relevant endpoints for all members of a selected Category. A sample matrix is shown in the following screenshot:
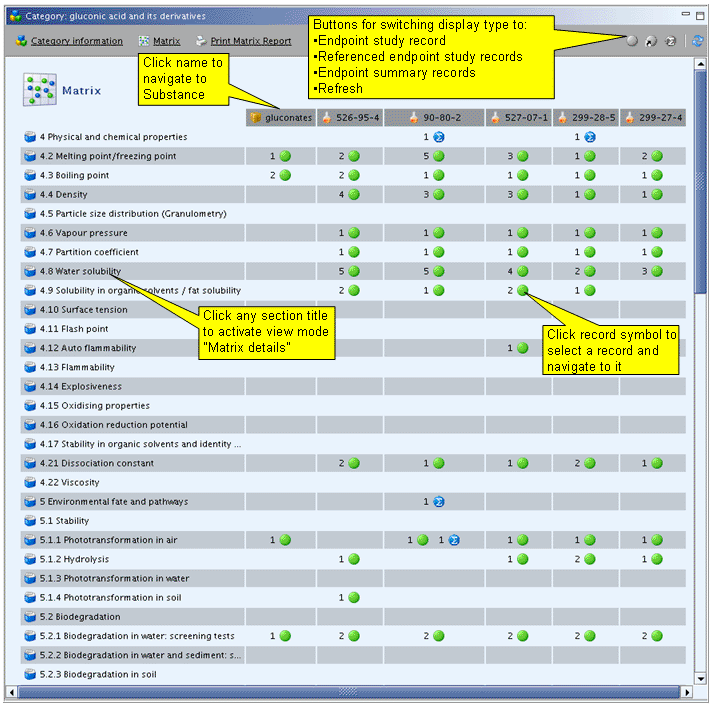
The matrix consists of the following elements:
The first column displays the Endpoint sections.
All other columns display the category member Substances and, if a section contains any records, a number and a symbol indicating the number and type of records, i.e. (referenced) Endpoint study records and/or (referenced) Endpoint summary records. If an Inherit Template is assigned to the Category, it will be displayed in the left of the Substances (see "gluconates" in the screenshot above). The latter are sorted according to the order defined in the Category.
Following functions are provided (see also the screenshot above):
Switch display type: In the navigation bar in the upper right corner, buttons are provided for switching to following display types:
Display only Endpoint study records
Display only referenced Endpoint study records
Display only Endpoint summary records
Refresh: Updates the matrix with any changes made after opening it. This is normally only relevant if you are connected to a network multi-user application of IUCLID. In a single server application, this feature might be useful, if you started to import records into datasets, but created the matrix while the data import was stilling running as background job. After the import is finished, any imported records will only be displayed in the matrix when you click the Refresh button.
Click the name of any Substance in the respective column to navigate to that Substance dataset. By clicking the Back button
 on the toolbar, you can then navigate back to the
Matrix.
on the toolbar, you can then navigate back to the
Matrix.Clicking any record symbol displays a list of available records in that section. Clicking a specific record opens it directly. By clicking the Back button
on the toolbar, you can then navigate back to the
Matrix.Clicking a section title will display details of all related records for all category members, as shown in the following screenshot:
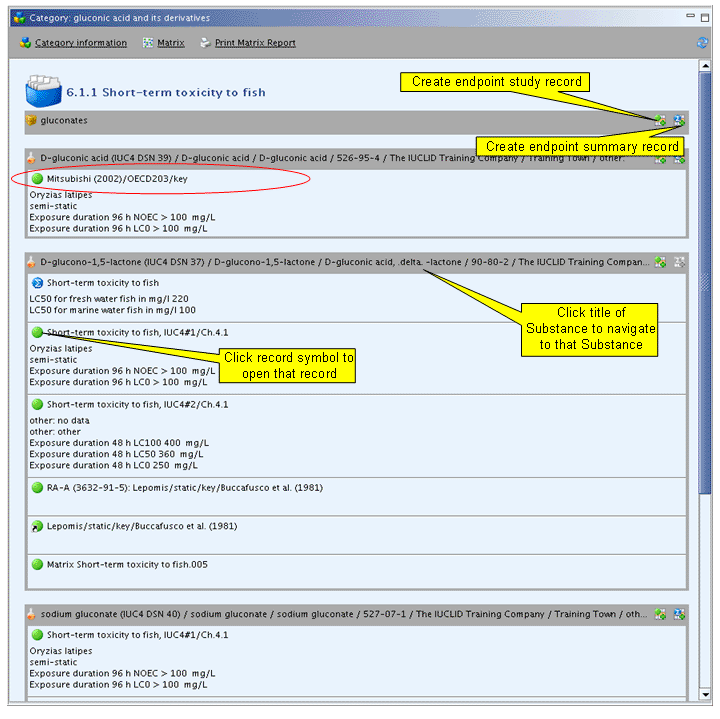
The following functions are provided in the detailed Matrix (see also the screenshot above):
Create Endpoint study record
 and Create endpoint summary
record button
and Create endpoint summary
record button  : Clicking either of these buttons creates an
empty record for the respective section and Substance and inserts it in
the Matrix. Clicking the record symbol opens the record for entering
data. Note that the Create endpoint summary
record button will be locked, if such a record already exists
for that section.
: Clicking either of these buttons creates an
empty record for the respective section and Substance and inserts it in
the Matrix. Clicking the record symbol opens the record for entering
data. Note that the Create endpoint summary
record button will be locked, if such a record already exists
for that section.Click any Substance header to navigate to that Substance dataset. By clicking the Back button
on the toolbar, you can then navigate back to the
Matrix details.Clicking any record symbol will open the respective record directly. By clicking the Back button
on the toolbar, you can then navigate back to the
Matrix details.
The details displayed in the Matrix view above are limited to a few key parameters. For instance, only the test organism, test type, and all effect concentrations including exposure duration are shown for section 6.1.1 Short-term toxicity to fish.
The amount of details displayed may be enhanced by renaming the records appropriately. An example is shown in the screenshot above: The circled record name "Mitsubishi (2002)/OECD203/key" quickly indicates the bibliographic reference, the test guideline used and the purpose flag (i.e. key study). For instructions on how to rename records, see chapter D.4.7.3 Renaming an Endpoint study record.
The Print Matrix Report feature allows to print an overview of all or selected endpoint data of sections 4 to 7.
Note
Although a Matrix Report lists the Endpoint sections defined for the Category on the title page for information, all Endpoint sections are covered in this report.
To print a Matrix Report
Click the Print Matrix Report link on the navigation bar.
The Print assistant comes up and guides you through a three-steps Print dialogue: Verify or change the default properties, for which the report shall be printed, specify output path, file name and other print options, and click the Finish button.
The following screenshots illustrate the print dialogues of the Print assistant:
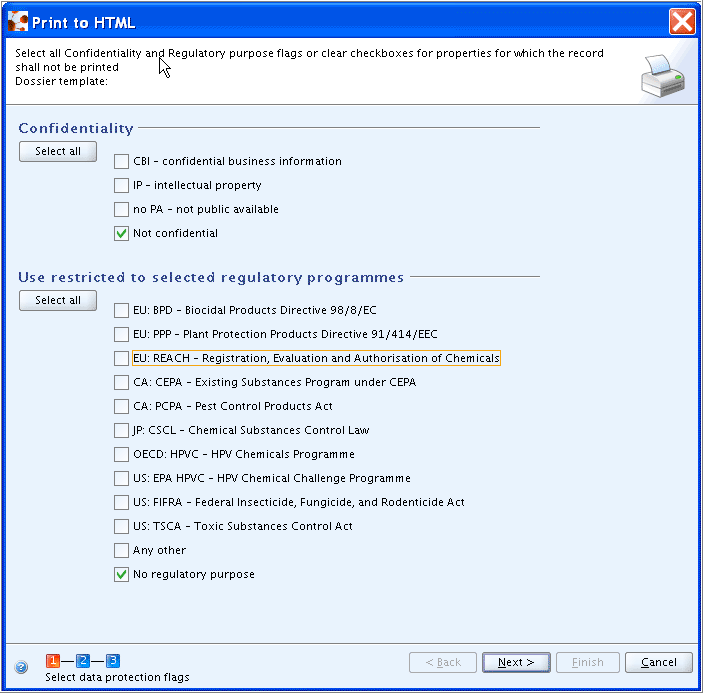
Step 1: Click the Next button if default settings apply (i.e. Not confidential and No regulatory purpose) or click the Select all buttons to select all Confidentiality and/or Regulatory purpose flags or clear checkboxes for properties for which no Endpoint records shall be included in the report.
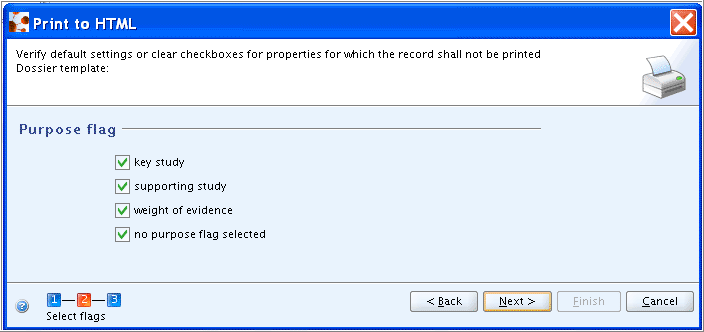
Step 2: Click the Next button if default settings apply (i.e. all checkboxes selected) or clear the checkboxes for properties for which the record shall not be printed (e.g. only key studies are printed if this flag is set only).
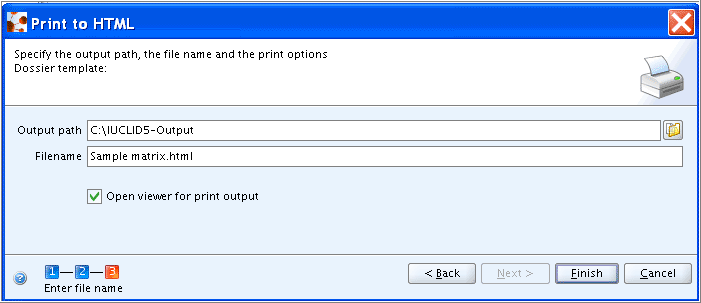
Step 3: Specify the output path, file name and print option (i.e. whether print-out shall be opened by the viewer, i.e. browser) and click the Finish button.