To create a new User, follow these steps:
Go Home
 to the Task panel if you are not already
there.
to the Task panel if you are not already
there.Under manage users, roles, preferences, etc
 , click User
management.
, click User
management.Caution
Only the SuperUser or a User with the Administrator role can create new User(s). If you have no administration rights (i.e. the Administrator role was not assigned to you), the User management link in the Task panel is inactive.
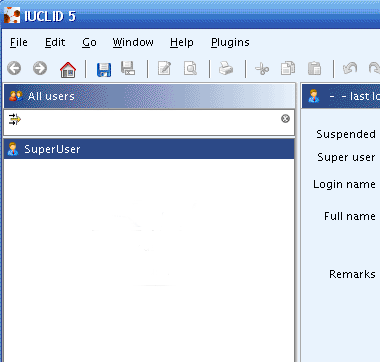
A screen appears with empty windows on the right side and a Query results pane on the left (below the title bar All users) showing all User(s) already defined in your IUCLID installation.
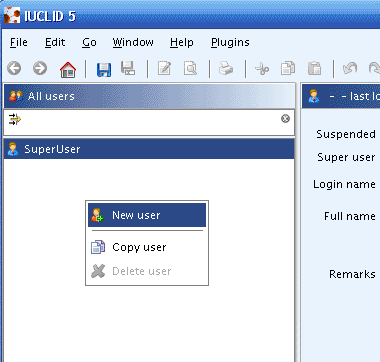
Right click in the query result pane and select the New user command from the context menu.
Note
You can associate to the site only an official Legal entity which has been assigned to your user account (see chapter D.16.1 Principles of administration tools for user settings).
The Data entry window becomes active. Fill in the following fields:
Login name:Enter the name you want to assign to the new User when he logs in.Caution
The User name shall be unique; therefore it is not possible to define two or more Users with the identical Login name. If a new User has the same Login name as one already existing, a warning window appears when you click the Save button. You are requested to provide another Login name to proceed.
Full name: Enter the full name of the User. It is mandatory to enter a name in this field otherwise the new User cannot be created.Set password:Click the Set password button.
The following window appears:
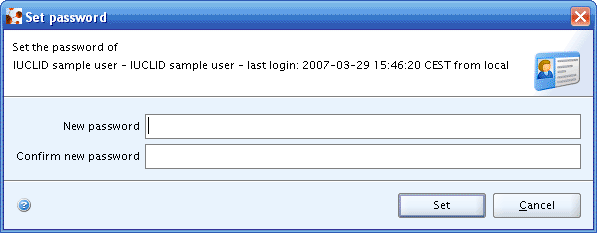
Type your password in the fields
New passwordandConfirm new password.Click the Set button to complete the operation.
Caution
User name and password are case sensitive. Check that you entered the correct user name, and password.
Remarks: Enter any comment you may have into this field.Unassigned roles/Assigned roles: To assign a Role to the User, follow these steps:- Select a Role in the list under Unassigned roles
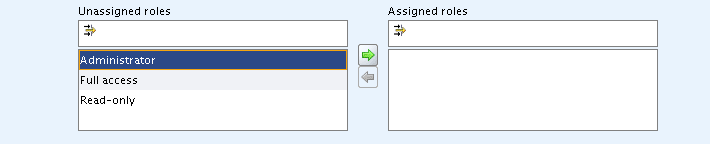
- Click the green Arrow button
 (1 in the
following screenshot) to assign the desired Role to the new User
(2 in the following screenshot).
(1 in the
following screenshot) to assign the desired Role to the new User
(2 in the following screenshot).
Tip
To remove the Role from the User, Select the Role in the list under Assigned roles, and click the green Arrow button

Assigned Legal entities: To assign a Legal entity to the User, follow these steps:Click the green Plus button
 under assigned Legal entities.
The following dialog appears:
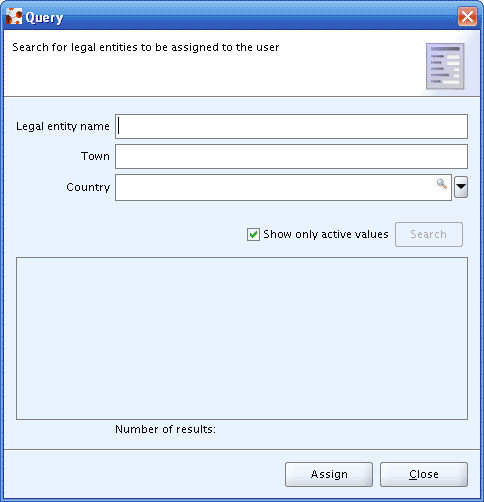
Enter your search criteria (wildcards such as * can be used. For detailed instructions on how to conduct queries in IUCLID see chapterD.15 Query and Search).
Click the Search button to run the query. IUCLID returns a list of Legal entities meeting your search criteria.
Click the Assign button to complete the process.
If you wish to assign another Legal entity to the same User, repeat the full process.
Note
Only official Legal entities (i.e. originating from the IUCLID web site) are retrieved.
Tip
If multiple Legal entities are assigned to a User, he needs to select which company he is currently working for in the bottom pane of the Task panel.
To copy a User
Right click the User name in the query result pane.
Select the Copy command from the context menu. The user selected will be copied and renamed as: "Copy of <username>".
To delete a User
Right click the User name in the query result pane.
Select the Delete command from the context menu. A warning message appears. If you still want to proceed, click the OK button.
Caution
Deletion is an irreversible operation.
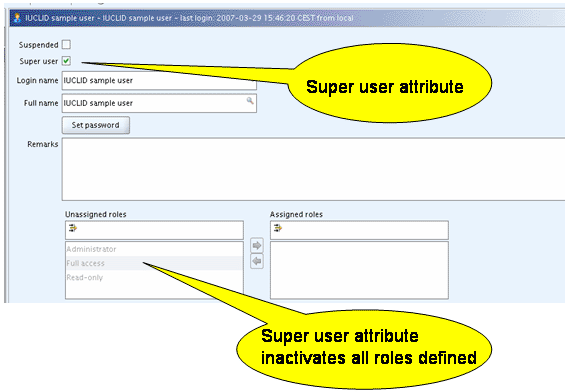
The SuperUser is the IUCLID5 default User. This User is granted all the rights necessary to access all operations and resources in IUCLID5. SuperUser has by default the Super user attribute and the status of this flag cannot be modified.
The Super user attribute grants full access to all operations and resources. If a User (different from the SuperUser) gets the "Super user" attribute, he will be able to act as the SuperUser and all Roles previously assigned to him become inactive.
To activate the Super user attribute, select the corresponding checkbox (see the sceenshot below).
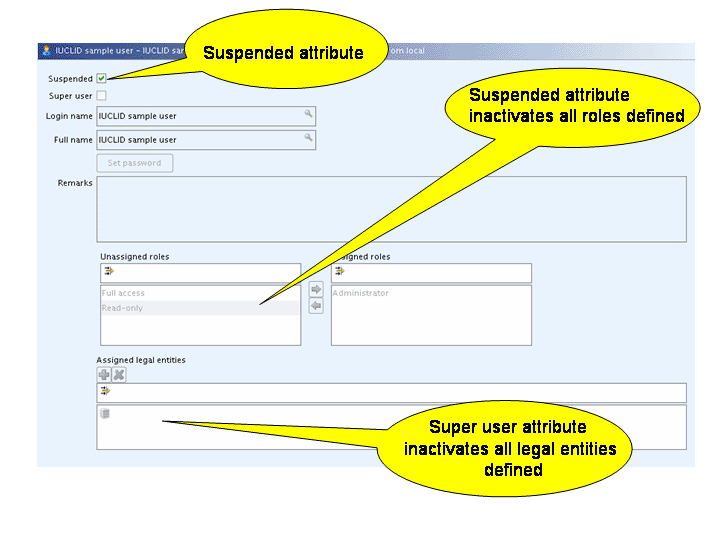
The Administrator can temporary disable one User. To do so, he needs to activate the Suspended attribute by selecting the corresponding checkbox. Role(s) and Legal entity(-ies) defined will be inactivate.
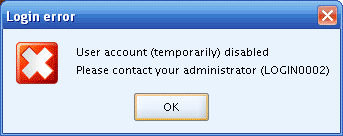
If a Suspended User tries to login, the following message appears:
To de-activate the Suspended attribute, the Administrator needs to deselect the corresponding checkbox.