In this chapter instructions are given on how to execute the migration of one or several IUCLID 4 datasets to IUCLID 5.
Prerequisite before you can start the migration tool is that you have created IUCLID 4 export file(s) of the dataset(s) you wish to migrate to IUCLID 5. Refer to the respective IUCLID 4 Manual on how to create IUCLID export files. Note that you need not migrate each dataset separately, but can migrate all or several datasets in one operation provided they are all included in one IUCLID 4 export file.
Note
The migration tool transforms IUCLID 4 datasets to IUCLID 5 datasets, but does not load them into your IUCLID 5 installation. You need to import the transformed datasets yourself after the migration process is finished.
Caution
Be aware of the hardware system requirements for IUCLID 5. The migration or import process would slow down considerably if the available RAM is not sufficient. A minimum RAM of 1 GB is recommended.
To migrate IUCLID 4 dataset(s) to IUCLID 5, either select the command
Migrate from the Plugins menu on the menu bar or Go Home
 to the Task panel, if you are not already there, and
click the Run button under task Migrate data. On the Migration wizard that comes up,
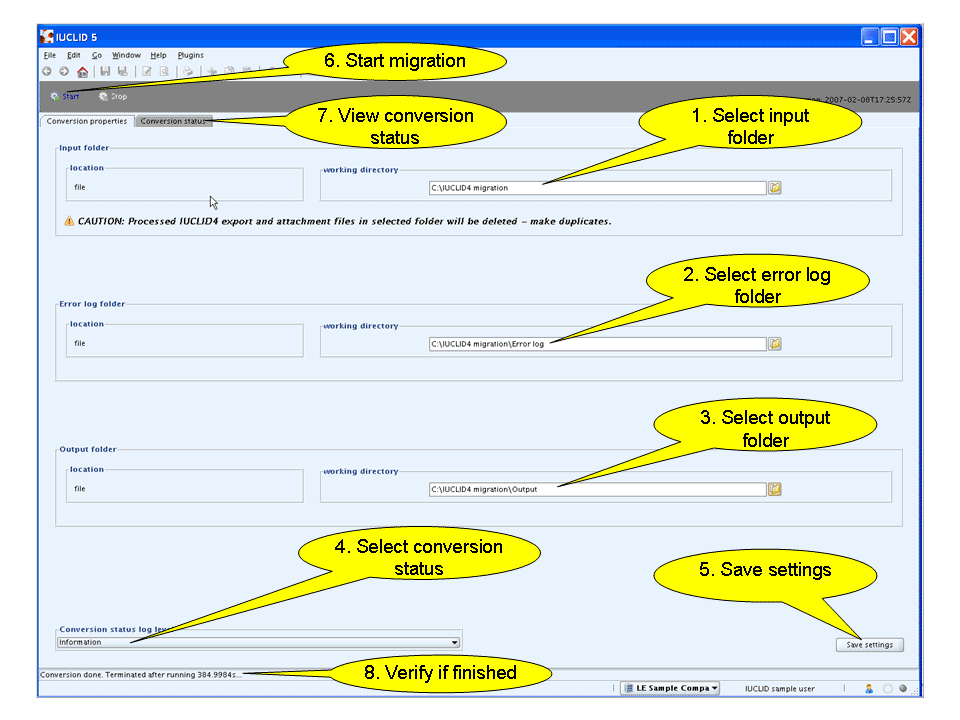
proceed as follows (see also screenshot below):
to the Task panel, if you are not already there, and
click the Run button under task Migrate data. On the Migration wizard that comes up,
proceed as follows (see also screenshot below):
Input folder: Open the File finder for the working directory and select the folder where the IUCLID 4 export file(s) including all attached documents are stored, unless you wish to keep the default settings.
Caution
As indicated in the user interface under Input folder, the IUCLID 4 export file and any attached documents will be deleted when the migration process is successfully completed. Keep copies of your original export files and attached documents in another folder.
Error log folder: Open the File finder for the working directory and select the folder where the log file containg the migration report shall be stored, unless you wish to keep the default settings.
Output folder: Open the File finder for the working directory and select the folder where the output file shall be stored, i.e. the IUCLID 5 export file containing the migrated data. The name of the created IUCLID 5 export file consists of the name of the original IUCLID 4 export file (without file extension "exp") plus the IUCLID 4 dataset number DSN of your local IUCLID 4 installation; file extension is "i5z". For example, the source file 50000.exp containing IUCLID 4 dataset DSN 69 would appear as IUCLID 5 export file 50000_DSN69.i5z.
Conversion status log file: Select the level of detail that will be reported in the conversion log. In order of decreasing detail the levels are:
Debugging
Information
Warning
Error
Click the Save settings button to keep the settings for any further migration sessions.
Click th Start button
 in the upper left to start the migration
process.
in the upper left to start the migration
process.Tip
The conversion can always be stopped at any given point in time by clicking the Stop button
 . When the conversion is started again at a
later stage, the migration tool will process the remaining
files.
. When the conversion is started again at a
later stage, the migration tool will process the remaining
files.Click Tab Conversion status to view the status of the transformation process.
Verify if the migration process is finished: The following message occurs to the left on the bottom line: "Conversion done. Terminated after running ....".
After the migration process is finished, go Home to the Task panel and start to import the newly
created IUCLID 5 export file containing the transformed dataset(s). In the
Task panel, click the Import button. The
Import assistant will guide you through the following steps of the import
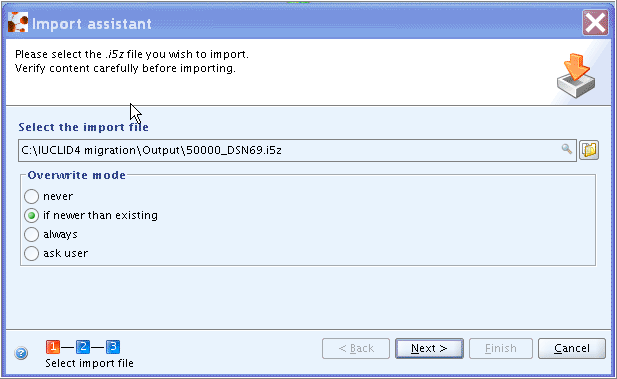
process (see the screenshot below):
Select the IUCLID 5 import file created out of the corresponding IUCLID 4 export file from the respective folder (i.e. the folder set as Output folder in the Migration wizard) and click one of the radio buttons to set either one of the following Overwrite modes:
never
if newer than existing (default)
always
ask user
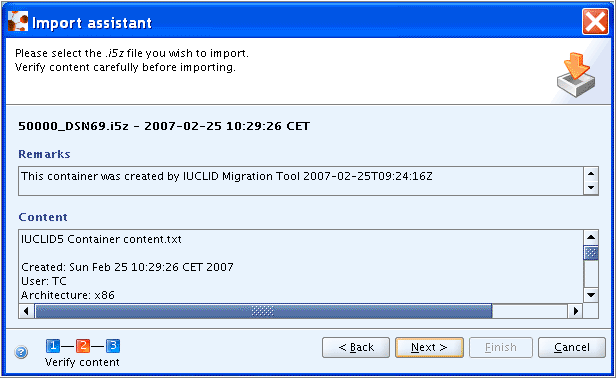
Verify the content of the import file shown. If not correct, click the Back button and select the correct import file.
Prepare the import: The import file is analysed. Be patient and wait until the record counter is finished. Then proceed as follows:
Select the records to be included in the import, unless already selected by default: Either select the checkboxes for single records or, even faster, right-click into the Import assistant window and from the menu displayed, choose the Select or Deselect command and then All to select / deselect all records either:
By type:
Additional information
Legal entity
Reference substance
Study
Substance
Summary
or By status:
identical to local
older than local
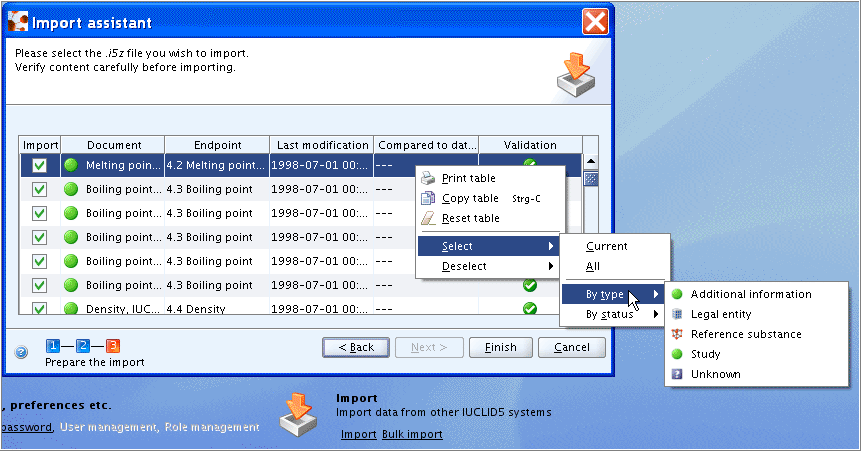
Click the Finish button to execute the import.
Tip
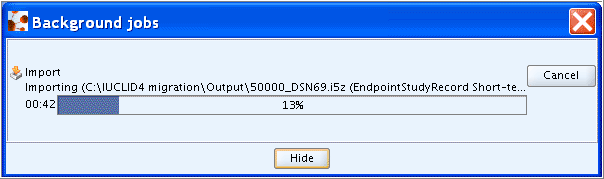
Once the import process has been started, you can continue any other IUCLID job. To open the background jobs indicator showing the progress of the import, select the command Background jobs from the Window menu on the menu bar or click the background job indicator on the very right of the bottom line:
Caution
If the migration or import process fails, the following reasons may be possible:
Migration failed completely: The source export file may be damaged or contain invalid characters. In the IUCLID 5 folder, check whether a log file has been created for that export file. An example is shown in the following screenshot:
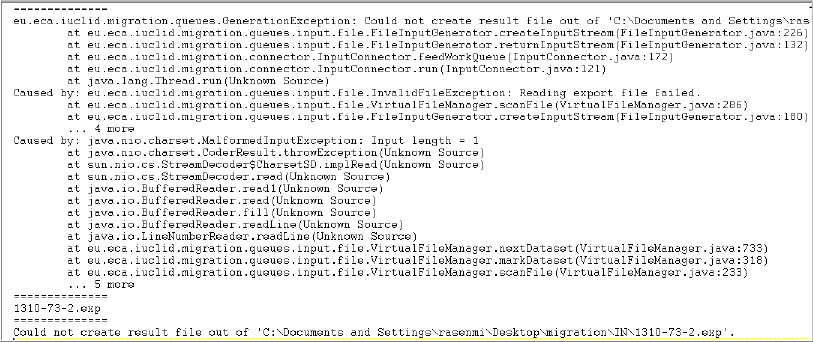
As a workaround you can try to re-import the export file into your IUCLID 4 installation. This may clean it and remove the invalid characters. Create a new export file then and try the migration again.
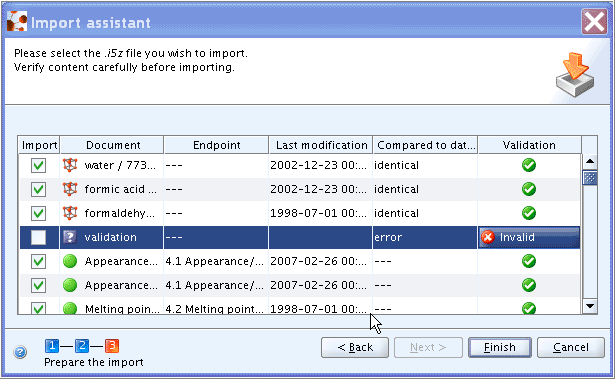
Migration and subsequent import of the IUCLID 5 dataset apparently succeeded, but the respective Substance dataset is not available: This may be due to an invalid entry that was not detected during migration. In step 3 of the Import wizard, carefully check whether a record is marked "Invalid" as shown in the screenshot below. Click the Invalid button and review the error message.
More information on bulk import (i.e. importing more than one data set at the same time) in IUCLID 5 can be found in chapter D.14.10 Bulk import feature.