IUCLID実践セミナー テキスト
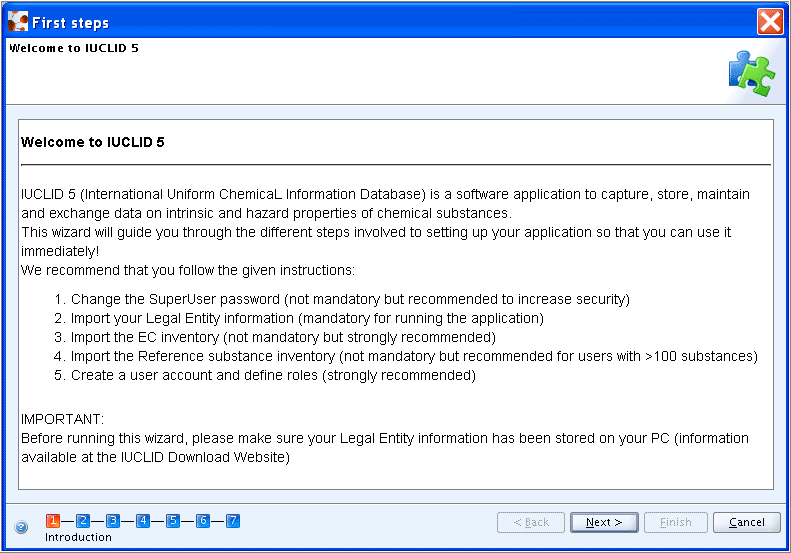
When you start IUCLID for the first time, after installing it on your computer, a First steps wizard will come up, which guides you through the different steps involved to setting up your application so that you can use it immediately. If the IUCLID application and your user account have been set up by your administrator, you can skip this chapter. コンピュータへのIUCLIDのインストール後、最初の起動時に、First steps ウィザードが起動します。First steps ウィザードは、アプリケーションのセットアップに関連するあなたの数ステップを案内してくれます。その結果あなたはそのアプリケーションをすぐに使用できるようになります。IUCLIDアプリケーションとユーザ・アカウントが管理者によってすでにセットアップされている場合この章をスキップすることができます。 Any user-related settings can also be made using the features described in chapter D.16 Manage Users, Role, Preferences etc. , although for some of them SuperUser rights are required (see chapter D.16.2.1 Difference between SuperUser and "SuperUser" attribute ). ユーザに関連する設定は D.16章「ユーザ、役割、設定などの管理」で詳しく述べられている機能を使用しても行うことができますが、その中のいくつかについては、SuperUser(スーパーユーザ)権限が必要になります( D16章16.2.1.「SuperUser」と「SuperUser属性」の違い」参照)。
Important
重要
This wizard helps to define a user account, which is a prerequisite to work with the application. This is not possible when logging in with the SuperUser account that is provided as administrator account by default.
このウィザードにより、アプリケーションを使用して作業する際にあらかじめ必要となるユーザ・アカウントを設定できる。ただし、デフォルト設定で管理者アカウントとして提供されているSuperUserアカウントでログインした時点で、これを行うことはできない。[参照 訳脚注1]
Before running this wizard, make sure that at least the Legal entity information of your Company/organisation is stored on your computer in the form of a IUCLID export file (for more information, see chapter D.9.2.1 Creating an "official" Legal entity).
このウィザードを実行する前に、少なくとも自身の会社・組織についての法人[訳注: Legal Entity]情報が自身のコンピュータにIUCLIDエクスポートファイルの形式で保管されていることを確認すること (詳細については、D.9章「公式のLegal entityの作成方法」を参照)。
Following information can also be uploaded at a later stage, but it is strongly recommended to have the following files stored on your PC already when you run this wizard:
以下の情報は後の段階でもアップロードできるが、このウィザードを起動する時点で、自身のPCに以下のファイルを保管しておくことを強く推奨する:
-
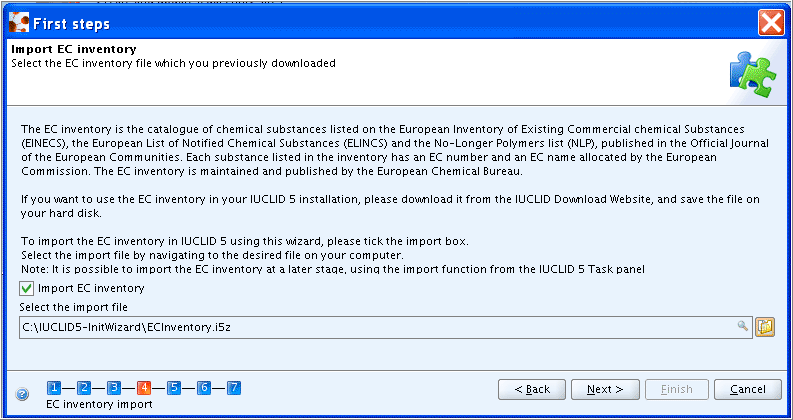
EC Inventory (for details, see chapter D.12 Inventory (View EC Inventory related information)
-
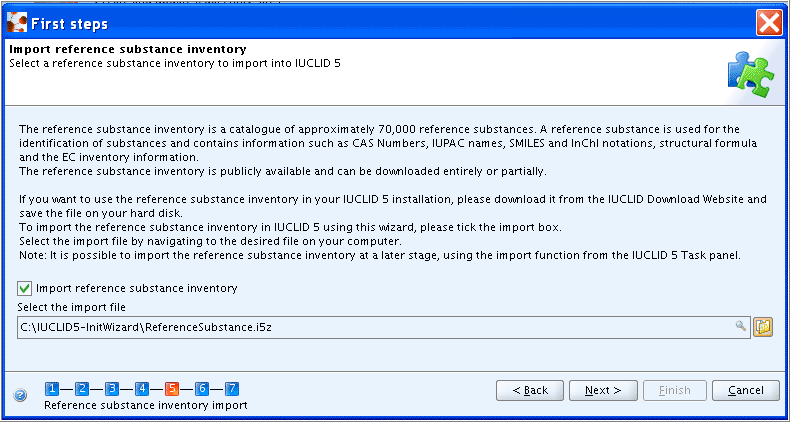
Inventory of Reference substances (for details, see chapter D.11 Reference substance (Create and update Reference substance related information))
ECインベントリ(詳細についてはD.12章「インベントリ(ECインベントリ関連情報の表示)」参照。)
- 参照物質インベントリ(詳細については、 D.11章「参照物質(参照物質関連情報の作成と更新)」参照。
Note
If you want to launch the wizard manually, log in as "SuperUser" and from the File menu select the Administrative tools and Initialise commands.
Note
もしこのウィザードを手動で起動させたいときには、"SuperUser"としてログインし、FileメニューからAdministrative tools(管理ツール)、 Initialise(初期化)コマンドを選択する。
To set up your IUCLID application for the first time and create a user account suitable for every day work and to assure that the installation was performed correctly, follow these steps:
最初にIUCLIDアプリケーションをセットし、毎日の作業に適したユーザアカウントを作成するためには、そして、そのインストールがうまくいったことを確認するために、次のステップを実施する:
-
Start IUCLID by clicking the respective icon on your desktop
デスクトップにある該当するアイコンをクリックしてIUCLIDを開始する。

-
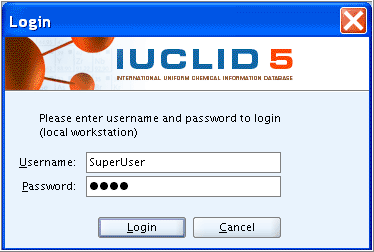
When starting the application for the first time, the only user available is the administrator, named "SuperUser". Log in as administrator by entering the following (case-sensitive!) names:
初めてそのアプリケーションを開始したときには、利用できるユーザは管理者"SuperUser"だけである。管理者としてログインするために次の名前を入力する(ケース・センシティブ訳注であることに注意!):
-
Username: SuperUser
-
Password: root
-
Username(ユーザ名): SuperUser
-
Password(パスワード): root
-
-
The First steps wizard comes up with general information in Step 1. Click the Next button
First stepsウィザードによって、第1ステップとして一般的な情報が示される。Nextボタンをクリックする。
-
Step 2: If you have not changed the default password of the SuperUser to a more secure password, the traffic light in the wizard screen will be yellow. Select the
Change SuperUser passwordcheckbox, type the old password "root" and then type the new password. Click the Next button.ステップ 2: もしあなたがSuperUserのデフォルトパスワードをもっと安全なパスワードに変更していなければ、ウィザード画面内の信号機が黄色になるだろう。
Change SuperUser passwordチェックボックスを選択し, 古いパスワード"root"とタイプし、新しいパスワードをタイプする。Nextボタンをクリックする。
-
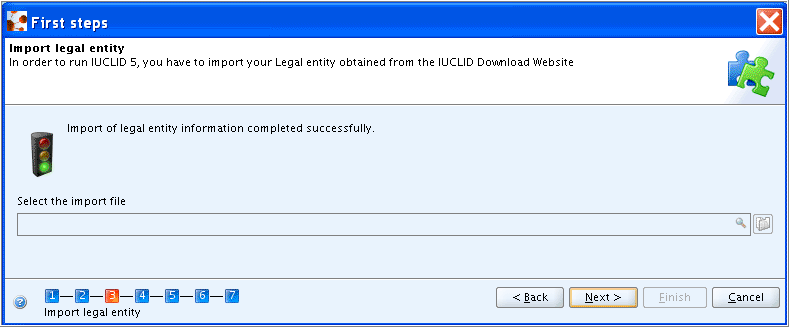
Step 3: Select the import file for the Legal entity (see introductory remarks above) and then click the Next button. The Legal entity will be imported immediately.
ステップ 3: Legal entityのインポートファイルを選択 (参照:上にある重要欄)し、 Nextボタンをクリックする。 Legal entityはただちにインポートされるだろう。
Important
Note that you have to import at least one Legal entity in order to succeed with this wizard. If you have no Legal entity in the IUCLID system, the traffic light in the wizard screen will be red. The First steps wizard will be automatically launched when you log in IUCLID, until a Legal entity has been successfully imported.
注意:このウィザードをうまく実行するには少なくとも一つのLegal entityをインポートしなければならない。もしIUCLIDシステム内にLegal entityを入っていなければ、ウィザードの信号機は赤だろう。Legal entityがひとつうまくインポートされるまで、First steps wizardは自動的にIUCLIDにログインしたときに起動するだろう。
-
Step 4: Select the file for the EC inventory (see introductory remarks above). The EC Inventory will not be imported immediately. The import will start at the end of the First steps wizard. Depending on your machine speed and the size of the inventory, this import may take some time, i.e. up to half an hour.
ステップ 4: ECインベントリに関するファイルを選択する(参照 このページの一番上の重要欄). ECインベントリはただちにインポートされない。そのインポートはFirst stepsウィザードの終了時点で開始する。 コンピュータのスピートどインベントリのサイズによってこのインポートにかかる時間は変わり、30分はかかるだろう。
-
Step 5: Select the file for the Reference substance inventory (see introductory remarks above). The Reference substance inventory will not be imported immediately. The import will start at the end of the first steps wizard together with the EC Inventory import. Depending on your machine speed and the size of the inventory, this bulk operation may take a very long time. The Reference substance inventory itself may take up to several hours for import!
ステップ 5: Reference substance(参照物質)インベントリのファイルを選択する (参照 このページの一番上の重要欄)。 その参照物質インベントリは直ちにはインポートされない。インポートはECインベントリのインポートと一緒にFirst stepsウィザードの終了時点で開始する。コンピュータのスピードとインベントリのサイズによってこのバルク処理にかかる時間は変わる。参照物質インベントリそれ自身はインポートするのに数時間はかかるだろう!。
Note
If you do not wish to import the complete Reference substances inventory into your IUCLID system, individual Reference substances files are available for download at the IUCLID web site.
もし全参照物質インベントリ(complete Reference substances inventory)をあなたのIUCLIDシステムに入れることを望まないのであれば、個々の参照物質ファイルをIUCLIDウェブサイトでダウンロードして使用できる。
-
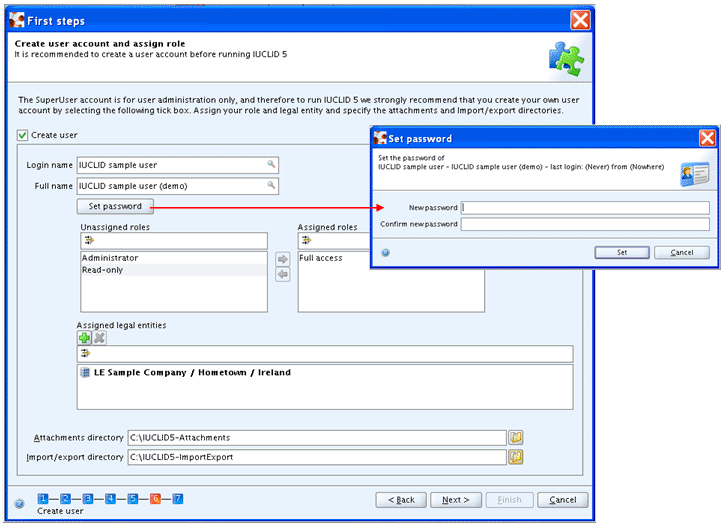
Step 6: Create a new user account and assign a role to this user, which defines the user's access rights to the data. It is necessary to create a new user as working with the SuperUser is not supported.
ステップ 6: 新しいユーザ・アカウントを作成し、このユーザに役割(role)を割り当てる(assign)、これによって、そのユーザのデータへのアクセス権限が定義される。SuperUserで作業をすることはサポートされていないので新しいユーザを作成する必要がある。
-
Select the
Create usercheckbox.Create userチェックボックスを選択する。Fill in all fields. The user needs a
Login namefor identification during login. TheFull nameis used for proper user identification. TheAssigned roleis needed to administrate the access permissions (in a newly installed IUCLID 5 the roles "Administrator", "Full access" and "Read-only" are provided by default).すべてのフィールドを入力する。ユーザには、ログイン中にユーザの特定をおこなうために
Login name(ログイン名)が必要である。Full name(完全名)は適切なユーザの識別に使用される。Assigned role(割り当てられた役割)はアクセス許可を管理するために必要である(インストールしたばかりのIUCLID5には"Administrator(管理者)", "Full access(フルアクセス)", と"Read-only(閲覧のみ)がデフォルトで提供される。) -
Enter a
Login name, as it should be used for identification during login, and theFull nameused for proper user identification.Login nameを入力(ログイン期間中にユーザ特定に使用される。)Full nameを入力(適切なユーザの特定に使用される) -
Optionally, click Set password and define a password.
任意で、Set passwordをクリックして、パスワードを設定する。
-
Click and highlight a role in the list of unassigned roles and assign it to the user by clicking the Right arrow. Assigning a Role is needed to administrate the access permissions (in a newly installed IUCLID, the roles "Administrator", "Full access" and "Read-only" are available by default).
未割当の役割のリスト中の一つのロールをクリックして反転表示してRight arrow(右矢印)をクリックしてユーザにそれを割り当てる。ある役割(Role)の割当はアクセス許可を管理するために必要である(インストールしたばかりのIUCLIDでは、役割"Adminstrator"(管理者)、"Full access"(フルアクセス)、"Read-only"(閲覧のみ)がデフォルトでは与えられている。
Tip
It is recommended to create a User with the "Administrator" Role regardless of whether a stand alone or a distributed version of IUCLID is set up. Once a User has been created, the IUCLID Administrator (in case of a distributed version) can define different other User(s) and assign different Role(s) to them (see chapter D.16.1 Principles of administration tools for user settings).
スタンドアローンバージョンとデストリビューティッドバージョンのいずれのIUCLIDをセットアップしても"Administrator"の役割をもつユーザを一つ作っておくことを推奨する。いったん一つのユーザを作成したら、IUCLID管理者(デストリビューティッドバージョンの場合)は異なる他のユーザを作ることができ、それらに異なる役割を割り当てることができる(参照: D.16.1 Principles of administration tools for user settings)。
-
Assign a Legal entity (normally the Legal entity imported in the third step of this wizard) by clicking the green plus button and performing a search for the desired Legal entity. In the Query field
Legal entity name, enter the name of the desired Legal entity or an asterisk (*) as wildcard and click the Search button. In the Query results list, click the desired entry and then click the Assign button.緑色のプラスボタンをクリックして、必要なLegal entityの検索を実施して、Legal entityを割り当てる(通常はこのLegal entityは、このウィザードの第3ステップでインポートされる)。
Legal entity nameのQueryフィールドにおいては、必要なLegal entityの名前かアスタリスク(*)をワイルドカードとして入力し、Searchボタンをクリックする。Query(検索)結果リスト中で必要なエントリ(項目)をクリックしてから、Assign(割り当て)ボタンをクリックする。 -
Optionally, select default attachment and import/export directories. These settings can be made at a later stage as described in chapter D.16.5 Feature "User Preferences": How to set User Preferences.
任意で添付ディレクトリとインポート/エクスポートディレクトリを選択する。これらの設定はのちの段階で作ることも可能である。これについてはD.16.5 Feature "User Preferences": How to set User Preferences章に記載されている。
-
Click the Next button
Nextボタンをクリックする。
-
-
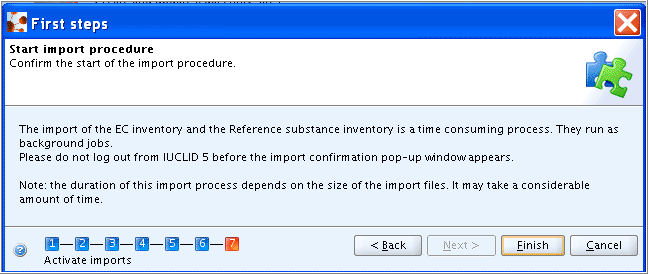
Step 7: If you have selected an EC Inventory and/or Reference substances inventory file(s) during the wizard steps, you can now run the imports. Click the Execute imports button. Note again that these imports may take up to several hours, depending on your machine speed and the amount of data you are importing.
ステップ 7: もしウィザードの段階中にECインベントリとReference substancesインベントリ・ファイルのいずれかまたは両方を選択していた場合、ここでインポートを実行できる。 Execute importsボタンをクリックする。今一度注意していただきたい。このインポートは数時間はかかる。かかる時間はコンピュータのスピードとあなたがインポートするデータの量によっている。
Then click the Finish button. If you have launched any imports, you will now have to wait until the imports are completed. Afterwards, you should log out and then log in again as a user for the newly defined account (remember: working as SuperUser is not supported).
ではFinishボタンをクリックする。もしどのインポートを起動したとしても、あなたはインポートが完了するまで待たねばならない。その後、ログアウトしてから新しく定義されたユーザとして再度ログインしなければならない(覚えていますか: SuperUserとしての作業することはサポートされていない)。