When you print a Category to an HTML document, all related Substance and Template datasets including all contained Endpoint study / summary records are included in the Document selection dialogues for sections 1 to 3 and sections 4 to 13, respectively. This provides great flexibility as to which elements shall be used for the print-out:
Print all associated documents, i.e. the Category itself and all category member Substances.
Print the Category only and sections 1 to 3 of all or selected Substances and Templates (if any).
Print the Category and sections 1 to 3 of all or selected Substances and Templates (if any), plus selected Endpoint study / summary records from all or selected sections.
Print the Category and all or selected related Substances and Templates (if any), but without sections 1 to 3.
To print a Category
Go Home
 to the Task panel if you are not already
there.
to the Task panel if you are not already
there.Under Category
 , click Update.
In the Query results pane, right-click the Category to be printed and from the menu displayed, click the Print command (or select the Print command from the File menu).
The Print assistant comes up and guides you through a nine-steps Print dialogue: Verify or change the default properties (i.e. for which the records shall be printed), specify output path, file name and other print options, and click the Finish button.
The HTML document created can be opened from the respective folder, viewed and printed.
Note
The Print Category feature is almost identical with the Create Category Dossier feature, except for some Dossier-specific settings (see chapter D.8.2.5 Creating a Dossier for a Category). This is why the same "Dossier templates" are provided. This term should not be mistaken for the "Template" feature. A Dossier template defines which Endpoint sections shall be included in a Dossier or print-out. This is equivalent to the "view mode selector" described in chapter D.4.3.3.1 Section tree pane, which displays only sections needed for the chosen requirements. However, it is possible to set a certain view mode for entering endpoint data (e.g. view mode "Complete"), but use another setting of selected sections in the print-out.
The following screenshots illustrate the print dialogues of the Print assistant:
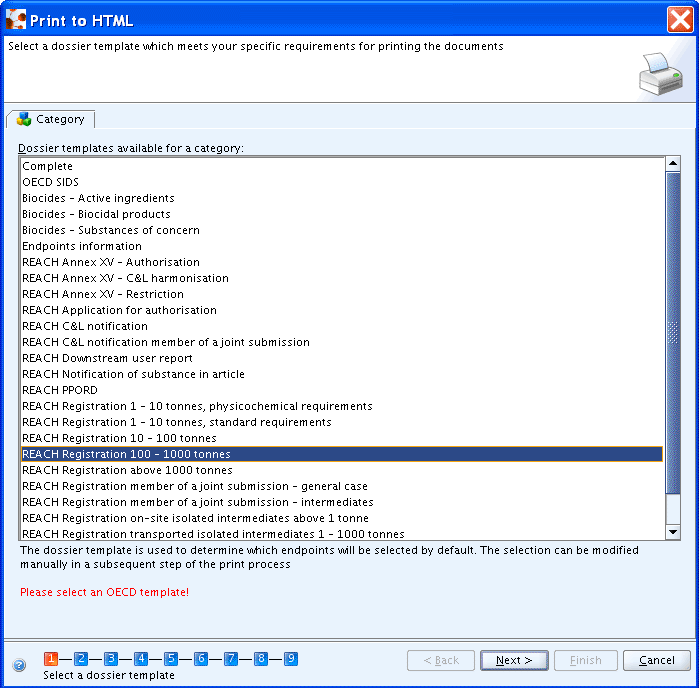
Step 1: Unless you wish to print all Endpoint sections (i.e. type "Complete"), select the Dossier template type that shall be used. (Note that the Print Category feature is almost equivalent to the Create Category Dossier feature. This is why the same Dossier templates are provided. A Dossier template defines which Endpoint sections shall be included in a Dossier or print-out. It should not be mistaken for the Template feature.)
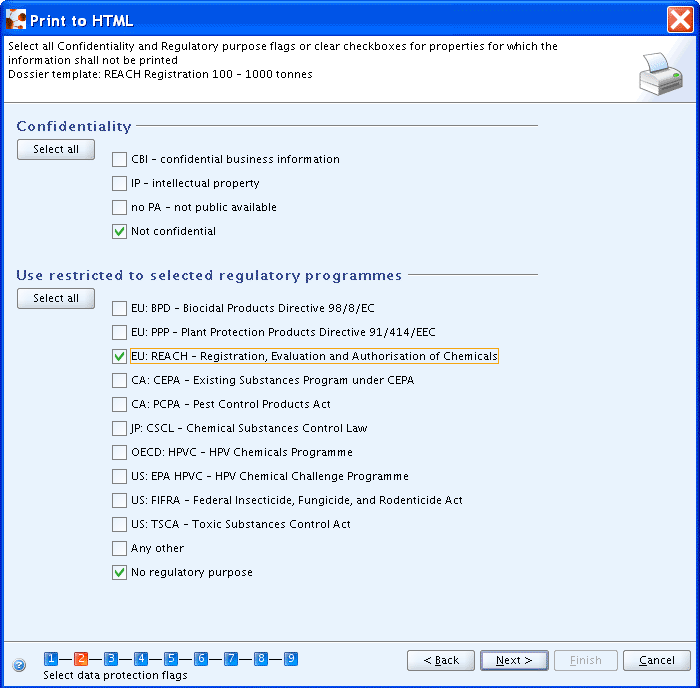
Step 2: Click both Select all buttons to select all Confidentiality and Regulatory purpose flags or clear checkboxes for properties for which records shall not be printed.
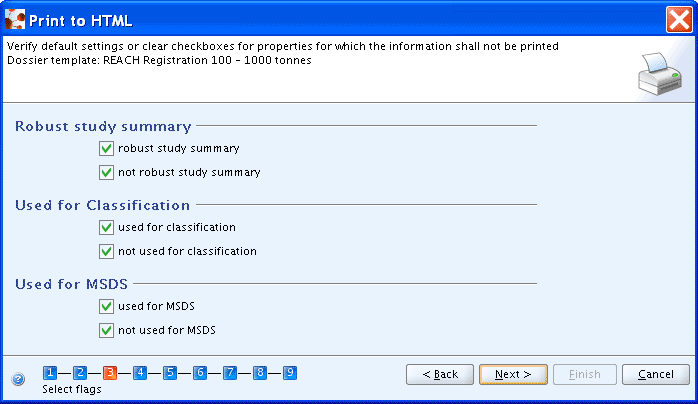
Step 3: Click the Next button if default settings apply (i.e. all checkboxes selected) or clear the checkboxes for properties for which records shall not be printed.
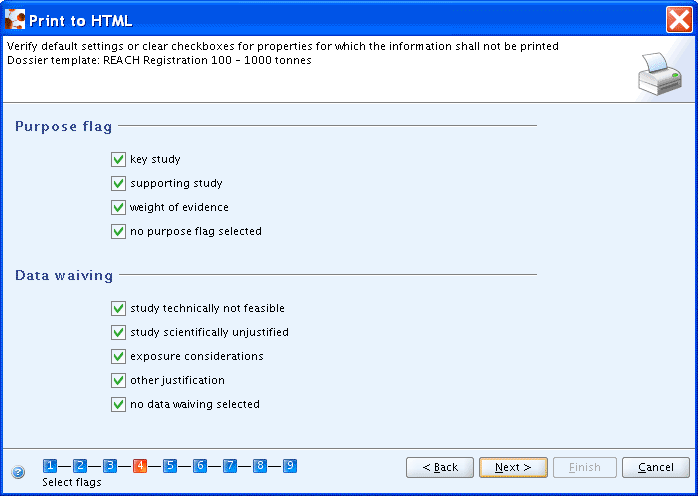
Step 4: Click the Next button if default settings apply (i.e. all checkboxes selected) or clear the checkboxes for properties for which records shall not be printed.
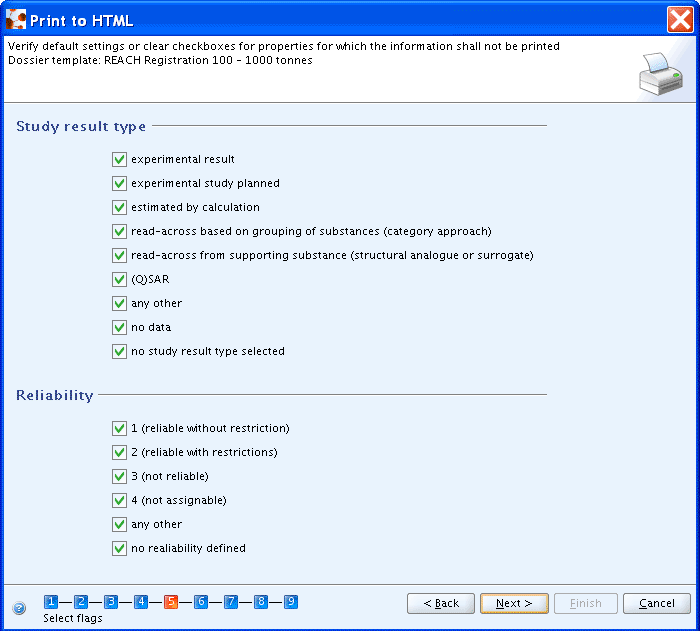
Step 5: Click the Next button if default settings apply (i.e. all checkboxes selected) or clear the checkboxes for properties for which records shall not be printed.
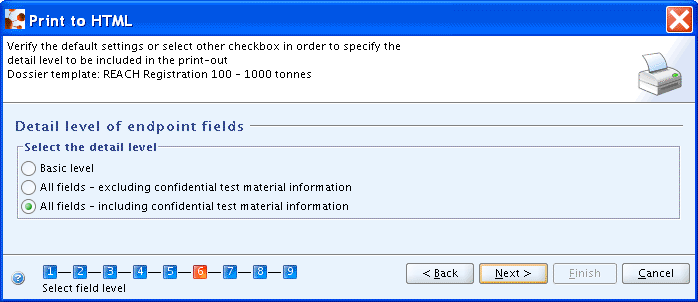
Step 6: Click the Next button if default settings apply (i.e. "All fields - including confidential test material information" selected) or select other checkbox in order to specify the detail level to be included in the print-out.
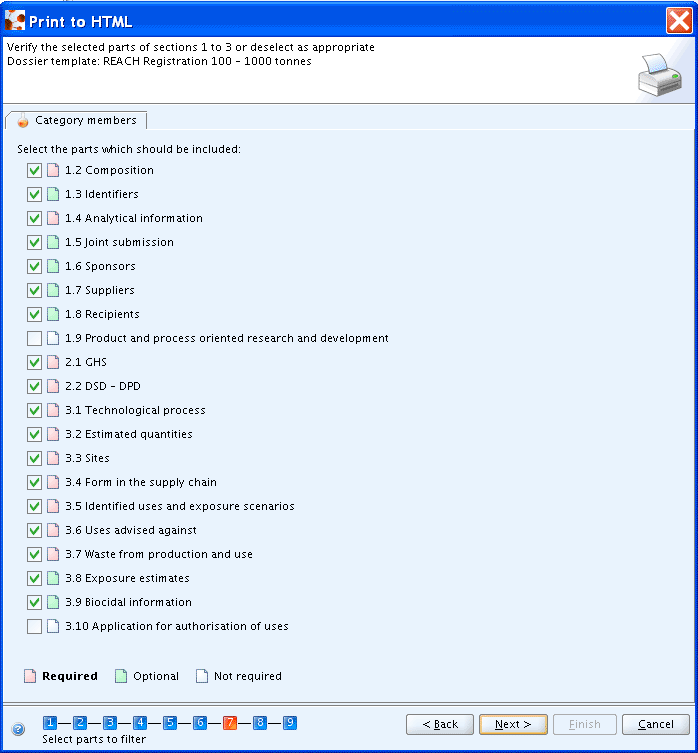
Step 7: Click the Next button if the default settings apply (i.e. all selected subsections of sections 1 to 3) or select/deselect as appropriate.
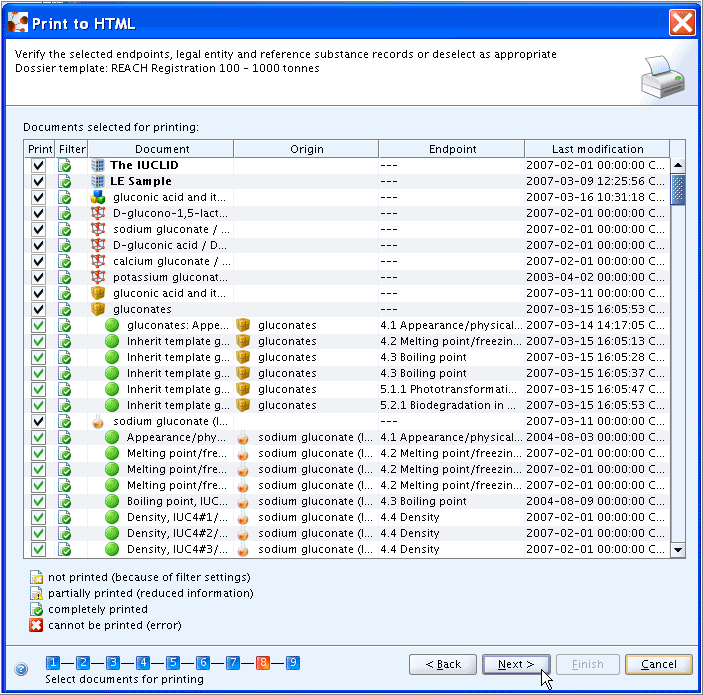
Step 8: Verify the selected Endpoint study / summary records or deselect as appropriate. Click the Next button to confirm.
Note
It is not possible to deselect the Substance, Template, Category, Legal entity or Reference substance records although indicated so in the help text of the dialogue box.
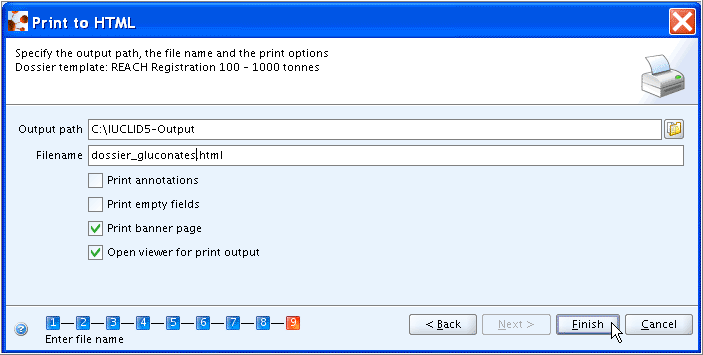
Step 9: Specify the output path, file name and print options (i.e. whether annotations, empty fields and/or banner page shall be included and whether the print-out shall be opened by the viewer, i.e. browser) and click the Finish button.